Showing posts with label Crafts. Show all posts

Friday, August 21, 2009

Craft: DIY Crayon Shapes


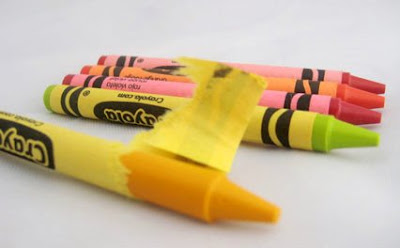
One of the greatest pleasures in life is a fresh new box of Crayola Crayons. Bring those puppies to school and you'd have to guard them with your life or else the boy next to you would wear down the points before you could say Burnt Sienna.

If you have a pile of crayon nubs sitting in an old Royal Dansk Butter Cookie tin now is the time to give them a second chance at life. Or maybe right now you're saying "I haven't had a tin of crayons in my house for 25 years!" - in that case, hit up your local dollar store and pick up a new box of crayons - you're about to make them way cooler.


Supplies:
  • Silicon baking pan or ice cube trays
  • Crayons (lots and lots, can be new, broken, whatever you have around)
  • Glitter (optional)
  • X-acto knife (optional)
  • Cookie sheet
  • Oven
Step 1
Preheat your oven to 250 degrees.
Peel the paper wrappers off your crayons. This is where you can use an X-acto knife by cutting a slip down each wrapper - or just use your fingernails.


Step 2

Now break the crayons into small pieces. The smaller you break the crayons, the easier they will melt. Tip: sort the crayons by color grouping and put them in a plastic baggie. Place the bag on a suitable surface (not your tiled kitchen floor) and use a hammer to smash up the crayons.


Step 3

Now fill up your tray with broken crayon pieces. You want to fill up each hole with as many crayons as possible, but be very careful not to leave any bits hanging over the edges. You can mix colors, keep it in the family (all reds, all blues), or make a solid color. Remember though - lots of different colors = brown. Tip: at this point you can also add a little bit of glitter if you feel so inclined.


Step 4
Put the tray on a cookie sheet and place in the oven. They will soon begin to turn glossy and melt together. You want to keep your eye on them and pull out the tray when they appear to be fully melted (10-15 mins)


Step 5

Pull the tray (still on cookie sheet) from the oven being careful not to spill any melted wax. Set these aside and let cool. As soon as they are cooled off you can pop them out and get to coloring!


Friday, July 31, 2009

Pink Sparkles!

One of my favorite girls turned 5 yesterday and I made her this necklace. She's a big fan of pink sparkles and I can't blame her - I too am a big fan of glitter and sparkles.


I used polymer clay to carve out her name, dipped it in glitter and then baked it in the oven. After it was baked I dunked it in Mod Podge, dipped it in more glitter, and then sealed it with more Mod Podge.


I chose to use a large clasp so it would be easy for 5-year old fingers.

Monday, June 8, 2009

Craft Fair Craziness

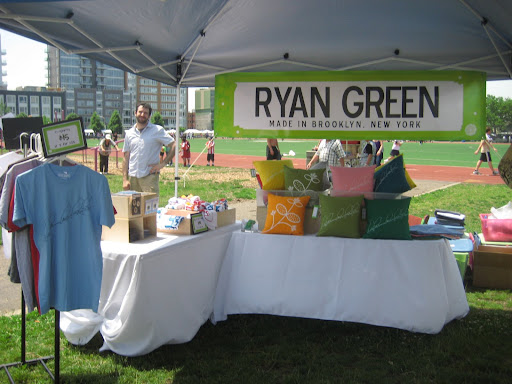
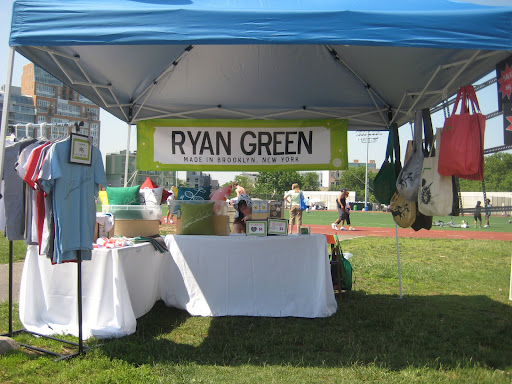
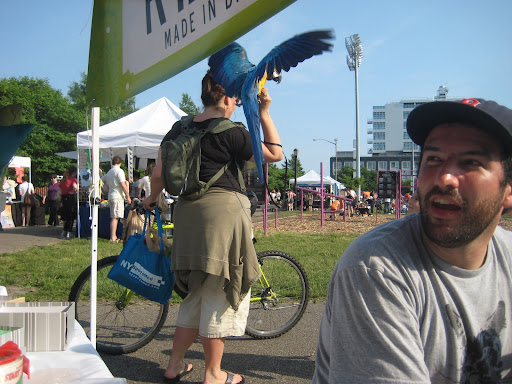
This weekend was the Renegade Craft Fair in Brooklyn's McCarren Park. I was a little concerned about the fair being moved to the park - it is usually in the old McCarren Pool - where we would be so spread apart and out in the open, but it ended up being AWESOME! I cannot believe how many people came out for the fair. Like, insane amounts of people...and I live in NYC so we're talking like bajillions.

Fairs are interesting because every time there is one items that sells way more than anything else at my booth. This time it was my new pillows! This was very validating and confidence-building because I put in a lot of time to sew 20+ pillows. I imagined a table filled with a rainbow of pillows and it totally came out the way I had it in my head.

I'll have a whole slew of new items appearing in my shop now that I have this fair behind me and new products customer-approved. In the meantime, if you saw anything at the fair that you'd like to purchase and it's not in my shop, just send me an email: ryan [at] ryangreendesigns [dot] com.

Thanks to all my friends who came to hang out with me at Abe at the booth - and thanks to all the wonderful people that bought items from me, said nice things, took a card, or passed along my info to another friend!!!

Saturday:


Sunday:


Friday, June 5, 2009

Renegade Craft Fair: BROOKLYN!!


Sorry I've been MIA all week, but the Renegade Craft Fair is this weekend and I have been sewing and screen printing my butt off*.

I'll be at booth #193. Hope to see you there!!!


* no butts were used in the making of my products.

Monday, March 9, 2009

Craft Sunday :: Dioramas

On Sunday I hosted another Craft Sunday at my apartment. The theme was Dioramas.

Everyone was supposed to read a book and then come prepared to create a diorama based on their book. This theme was loose - I also allowed free form dioramas. I was very proud of all my little crafters - they all gave 110% and everyone left with awesome projects.


Awwww. Now that's creepy.


Lauren is caught reading - get back to your collage!


Finishing touches.

The Beach by Alex Garland. Diorama by Colleen K.


"Woodland Creatures" diorama by Lauren E.


"In This Economy" diorama by Meredith B.


Watership Down by by Richard Adams. Diorama by Chelsea A.


"Mountain Sunrise" diorama by Preeya J.

Thursday, February 12, 2009

Tick-Tock, Tick-Tock

Does anyone out there remember the movie Return to OZ? Ohhhh godddd that is like my favorite movie in the entire world. I don't even want to see it as an adult because I fear it will ruin the magic.


Tik-Tok

Anyway, I'm working on making clocks. I have one clock face completed and I silk screened it the other day. I also silk screened some flowers in multiple colors, cut them out, and these will eventually be worked into the clock face. It's going tot be awesome.


The little flowers came out so awesome that I'm wondering if I should try making some little gift tags out of them.

Monday, December 22, 2008

DIY Links

I just did a swap in which we gathered free patterns/instructions for craft projects to 3 partners.

It was a great way to gather some new craft and DIY projects so I thought I would take some time today and post links to some simple-ish projects with instructions.

Recycled Catalogue Gift Tags


Courtesy of Peapods.Click here for complete instructions and blog post.


Gift Card Box


Courtesy of Heather Bailey. Click here for pattern download.

Paper Flower Ornaments


Courtesy of How About Orange. Click here for complete instructions.

p.s. I made these and used a glue stick instead of double-sided tape and it worked just fine. I also chose to use colored twine and fancied up some giftbags.


Recycled Cookie Tins


Courtesy of Ready Made Magazine. Click here for explanation of project.

Wednesday, December 10, 2008

Crafts at the ETSY Labs

Come make snow globes with me!


On Monday, December 15th, I will be at the ETSY Labs in Brooklyn, NY from 4-7pm and teaching a lesson on making snow globes! You don't have to come for the whole time, but leave yourself an hour in order to complete a snow globe.

Most of the supplies will be provided - just bring a smooth, clean, label & glue-free glass jar (pickle and applesauce jars are great).

More details and directions to the ETSY Labs can be found here: ETSY Labs Craft Night

* And if you don't live in NYC don't fret! Each craft night is also broadcast live into in the Treehouse room of the Virtual Labs. All demos will be shown both in the Labs in Brooklyn and in the Treehouse online.

Sunday, November 23, 2008

DIY Craft : Snow Globes

I have a little glass jar collecting problem. Sometimes I buy things at the grocery store just because I like the jars. Shhh..that's our little secret.

One way to put the jars to use is to make snow globes! A great little craft for this time of year.

You'll need:
  • Glass jar with lid (preferably one without texture)
  • Bottle cap or Crystal Light tub (optional)
  • Glitter (white, silver...your choice!)
  • Little figurines to put in your snow globe (not wood, paper or metal)
  • 8-12" inches of thin ribbon
  • Square of cotton fabric (approx. 6"x6")
  • Waterproof, quick-drying glue/epoxy (preferably one that dries clear
  • Glycerin
  • Distilled water (enough to fill your jar)
  • Rubbing alcohol or vinegar

1. First thing is to prepare your jar. You want to make sure you completely remove the label & glue. Goo Gone is good for this as is soaking it in hot, soapy water.Then you want to clean the inside of the jar and inside of the lid with rubbing alcohol. I didn't have rubbing alcohol so I used vinegar. It's nature's disinfectant.

2. Place your lid on a scrap of fabric and trace a circle that is about 1/2" wider than the lid. Cut this circle out with pinking shears (if you have them) because that will prevent fraying. If you don't have them then just use fabric that won't fray easily.

3. Now find yourself a bottle cap that will fit inside the lid and still allow you to screw the lid on the jar. This part is optional, but the bottle cap will lift up your figurines a little bit and make sure you don't glue things too far to the edge of the lid.

4. Take your epoxy and glue the bottle cap stage to the inside of the jar lid. The epoxy I used cost $3 and worked great - the only problem was that it dried brown so I had to be extra careful. This epoxy called for lining the bottle cap and the circle on the lid where I was gluing the bottle cap with epoxy and letting it dry for 5 minutes. Then I put the two pieces together - epoxy to epoxy - and let it dry for 5 more minutes.


5. This is the best part - now you get to set your scene! I have a big container of trinkets that I buy from dollar stores and from gumball machines. For this snow globe I chose a baked polymer clay mushroom that I made and a little squirrel.


6. Arrange the trinkets on your bottle cap stage and put the jar over the items to make sure it fits and can screw into the lid. You want to make sure before you glue everything down or you might have some sad faces after all this work.


7. If the jar will fit over the trinkets you are ready to glue. Again, follow the epoxy directions and then glue down your figurines.


8. Since my epoxy dried brown I wanted to cover that poo color. I added more epoxy and covered it in white glitter so it looks like the ground is snowy. You could also do this with green glitter to make grass or blue glitter to make water.


9. If you do Step 8 you will want to now take a Q-tip and sweep out all the extra glitter so it doesn't get in the way of the lid/jar seal.
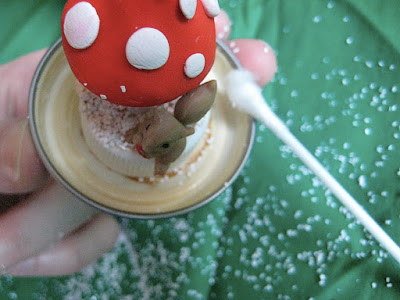


10. Now it's time to mix your snowy sky. Pour distilled water almost to the top of the jar. Now add glycerin a teaspoon at a time. The glycerin adds weight to the water so that the glitter will float and swirl and sink. I like to add a lot, but it's best that you add a little at a time until you get your desired swirl. If you are adding heavy objects (sequins, small trinkets, beads) you will need more glycerin.


11. You can always add more glycerin. Let's add in some glitter and see how it swirls. Remember - little at a time and you can always add more.


12. Once you think you got it you can screw the lid onto the jar (but first check that the epoxy on the trinkets is totally dry!). Now stand over the sink and do a test shake and see if you like the way the glitter swirls. It's okay if it drips - if you lose a lot of water you might have to refill.

13. If your swirl is desirable you are ready to seal up this puppy. With the lid on the jar & and the figurines upside-down take your epoxy and seal the space between the lid and jar. I let it dry once and then did a second seal of epoxy.


14. While the epoxy is drying you can work on the lid wrapping. Check to make sure the fabric circle is sized correctly - you want it to cover the lid, but not hide any of the globe. If the size it right you are ready to glue it down. Gluing isn't necessary, but makes the job easier. I gave the fabric a couple spritzes of this spray adhesive:


15. Just lay the circle on the lid and push the edges down. Take your length of ribbon and tie it around the lid. I sprayed one spot on the ribbon with as well just to help it hold better.


16. If you are positive the epoxy seal is dry you are ready to flip your globe and give it a shake! Now go be a stoner and put on some records while you lay on the carpet and play with your new toy.

Monday, November 17, 2008

Super Easy Drawer Organizer : Paper Boxes

Tonight I was putting away laundry, which takes about an hour if you have 2 giant blue Ikea bags full of clothes.


Where's Pawsldo?

Since the cooler weather started up I have been plowing through my collection of tights. The inside of my drawer is just a big ol' mess of tight legs and bra straps and random things that fall off my dresser and into my unmentionables.

So I found these super, duper easy instructions to make a paper box origami-style. Seriously, it took me 2 minutes AND I got to use up some paper that I was sick of looking at. Anyone can do this - all you need is a sheet of paper.


Voila! My tights are in their own little cubby and the three types of lingerie will never touch ever again...unless, of course, the rumors are true and when I turn out the lights they all get together and go hang out at a piano bar in Midtown. Bonus points for also getting a chance to find my navy blue tights and toss out a pair of satin panties circa 1997.

FYI - if you're feeling fancy you can check out this tutorial from KWernerDesignBlog on making paper gift boxes.

Polyvore = Loving the Internet More & More Everyday

I just discovered the website Polyvore.com. I love it because I always cut our pictures in magazine and collage them in a binder for ideas, but once they get glued down I can't really reuse the images.

Polyvore is a free web-based resource that let's you take images from around the World Wide Web and make a digital collage. I wish this was around when I was a child because this is basically all I wanted to do all day long. It's like of like the challenges on Stylista.

It's fun for decorating your dream house (a la M.A.S.H.), or choosing decor items for your real house before you make any purchases. Or, you could go the fashion route and put together outfits just like Cher did in Clueless.

Polyvore keeps a record of where each product came from so you can track it down later. You can also share your image with others or embed it on your blog.

I have to plan my booth for the Bust Holiday Craftacular and Polyvore is going to come in very handy.

Bust Craftacular by wickedmint

Obviously I have a lot of work to do. In the meantime, check out these sweet collages and go to Polyvore to create an account!


mushroom by deyana13inaz


Paris Purple........... by BrandedWitch